
Facial Injectables Before and After: What to Know Before Treatment
If you are considering facial injectables or are curious about the results you might achieve, you’re in the right place. ...
Read More
Thinking about enhancing your lips with fillers? You're not alone. Lip fillers are now one of the UK's most sought-after non-surgical cosmetic treatments, providing volume, definition, and symmetry with little downtime. But while the treatment itself is not too prolonged, the healing process of lip fillers can leave many first-time candidates with a myriad of questions.
In this blog, we will discuss the lip filler healing process. We'll take you through what happens after injections—lip filler healing stages, typical side effects, and tricks to maximise your recovery. Whether you're getting a subtle pout or a more defined russian lip filler style, knowing the lip filler healing timeline will leave you feeling ready and confident.
Once your lip filler treatment is complete, you may notice immediate swelling, tenderness, or slight bruising. This is perfectly normal. The lips are a sensitive area with a rich blood supply, so even gentle injections can cause a reaction.
The lip filler healing process varies from person to person, but most clients go through similar stages. Let’s take a closer look at the lip filler healing process day by day so you know what to expect and when.
After the injection, your lips will likely appear swollen and tender. It’s not unusual for swelling to make the lips look larger than intended—don’t panic! The filler needs time to settle, and the swelling will go down.
You may also feel slight firmness or bumps, but this is part of the lip filler healing stages.
This is typically the most dramatic day in the lip filler healing process. Swelling reaches its peak, and mild bruising may become more noticeable. Icing your lips and staying hydrated can help alleviate discomfort. Avoid touching your lips unnecessarily, and don’t engage in intense physical activity.
As swelling begins to subside, bruising may become more prominent. This is when many people worry unnecessarily. Remember, this is a normal part of the lip filler healing cycle and doesn’t indicate anything has gone wrong.

Swelling and bruising start to fade, and the true shape of your lips begins to reveal itself. At this stage, your lips may still feel a little firm, but the filler is settling in place.
At this point, most of the healing is done. You’ll notice more definition and a smoother texture. Your healing process 1 week lip filler swelling stages, should now be behind you, with only minor residual swelling, if any.
Several factors can influence your lip filler healing journey:
Although most of the noticeable healing happens in the first week, subtle internal settling can continue for up to 4 weeks. This is why many professionals suggest waiting a full month before deciding on touch-ups or judging final results.

During this time, it’s important to avoid harsh exfoliation, dental work, or facial treatments that might put pressure on the lips.
Here are some essential aftercare tips to promote smooth recovery through the lip filler healing stages:
While the majority of people experience a smooth lip filler healing process, you should contact your practitioner if you notice:
Early intervention can prevent complications, so don’t hesitate to reach out to your clinic.
The lip filler healing process is not something to fear—it’s something to understand and embrace. Armed with knowledge, you’ll be able to distinguish between what’s normal and what requires attention. Always consult a qualified professional and follow aftercare instructions carefully to enjoy your enhanced lips for months to come.
Whether you're navigating lip filler healing stages, considering a subtle enhancement, or opting for the more structured look of Russian lip filler, understanding the lip filler healing process day by day ensures you stay calm and confident throughout your recovery.
Most of the healing occurs within 7–10 days, but full results and internal settling can take up to 4 weeks.
Yes, swelling—especially in the first 2–3 days—is a normal part of the lip filler healing process and usually subsides within a week.
Avoid applying makeup on your lips for at least 24 hours to reduce the risk of infection or irritation.
It’s best to avoid strenuous exercise for 24–48 hours after your treatment to help reduce swelling and bruising.
Steer clear of alcohol, smoking, excessive heat (like saunas), and touching your lips for the first few days to support a smooth recovery.
//
If you are considering facial injectables or are curious about the results you might achieve, you’re in the right place. ...
Read More
Curious about whether 0.5 ml of lip filler makes a difference? Generally, yes, 0.5 ml of lip filler is noticeable,...
Read More
Lips play a bigger role in everyday life than most people realise. They help us speak clearly, eat comfortably, sense...
Read More
Ever stare in the mirror and spot those stubborn dark patches on your face that just won’t fade, no matter...
Read More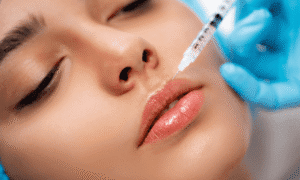
Ever looked in the mirror after a big laugh and thought, “Where did those lines come from?” Those smile lines...
Read More